Lab1
Assembly And Basic Development
List of Deliverables
Website Link: https://golnazmes.github.io/Robotics.html
GitHub Link: https://github.com/golnazmes/robotics-course
Written Report
Written Report: Steps taken, Challenges, and Solutions
In this report, I have explained the steps that I took in order to assemble and set up the robot and make it move and see.
I also aim to include the most used commands I used so that I will have sort of a cheat sheet at the end of the semester, of the commands and codes I need the most.
Assembling the Robot
I followed the instructions provided, step by step in order to assemble the robot. It was straightforward, and it took about 4 hours to assemble all the parts together.
Challenges
1 - The nuts were not easy to work with, especially when you wanted to set them to the provided place on the blue boards. I got help from TAs and used a rubber to loosen the space for the nuts to set them in more easily.
2 - At first, I connected the wrong cables which brought electricity to the board that shows the information about the CPU, temperature, etc. This caused the board to heat up so badly. Fortunately, I realized the issue and could turn off the robot, and manage the cables. This prevented the board from being damaged.
3- I also made a mistake with cables which resulted in the robot moving backward when clicking the forward move shortcut and vice versa. The issue was solved by reversing the cables which were responsible for the task.
Setup and Discover the Robot
After setting up the robot, and taking care of some details such as having the battery charged and the SD card flashed, now we can start working with the robot.
After turning on the robot, we can see if it is discoverable in the network:
$dts fleet discover
If the robot's name is there, we can now communicate with the robot: send commands or read the sensory input it receives.
My robot name is “csc22940”, so I can go to csc22940.local to see the dashboard:
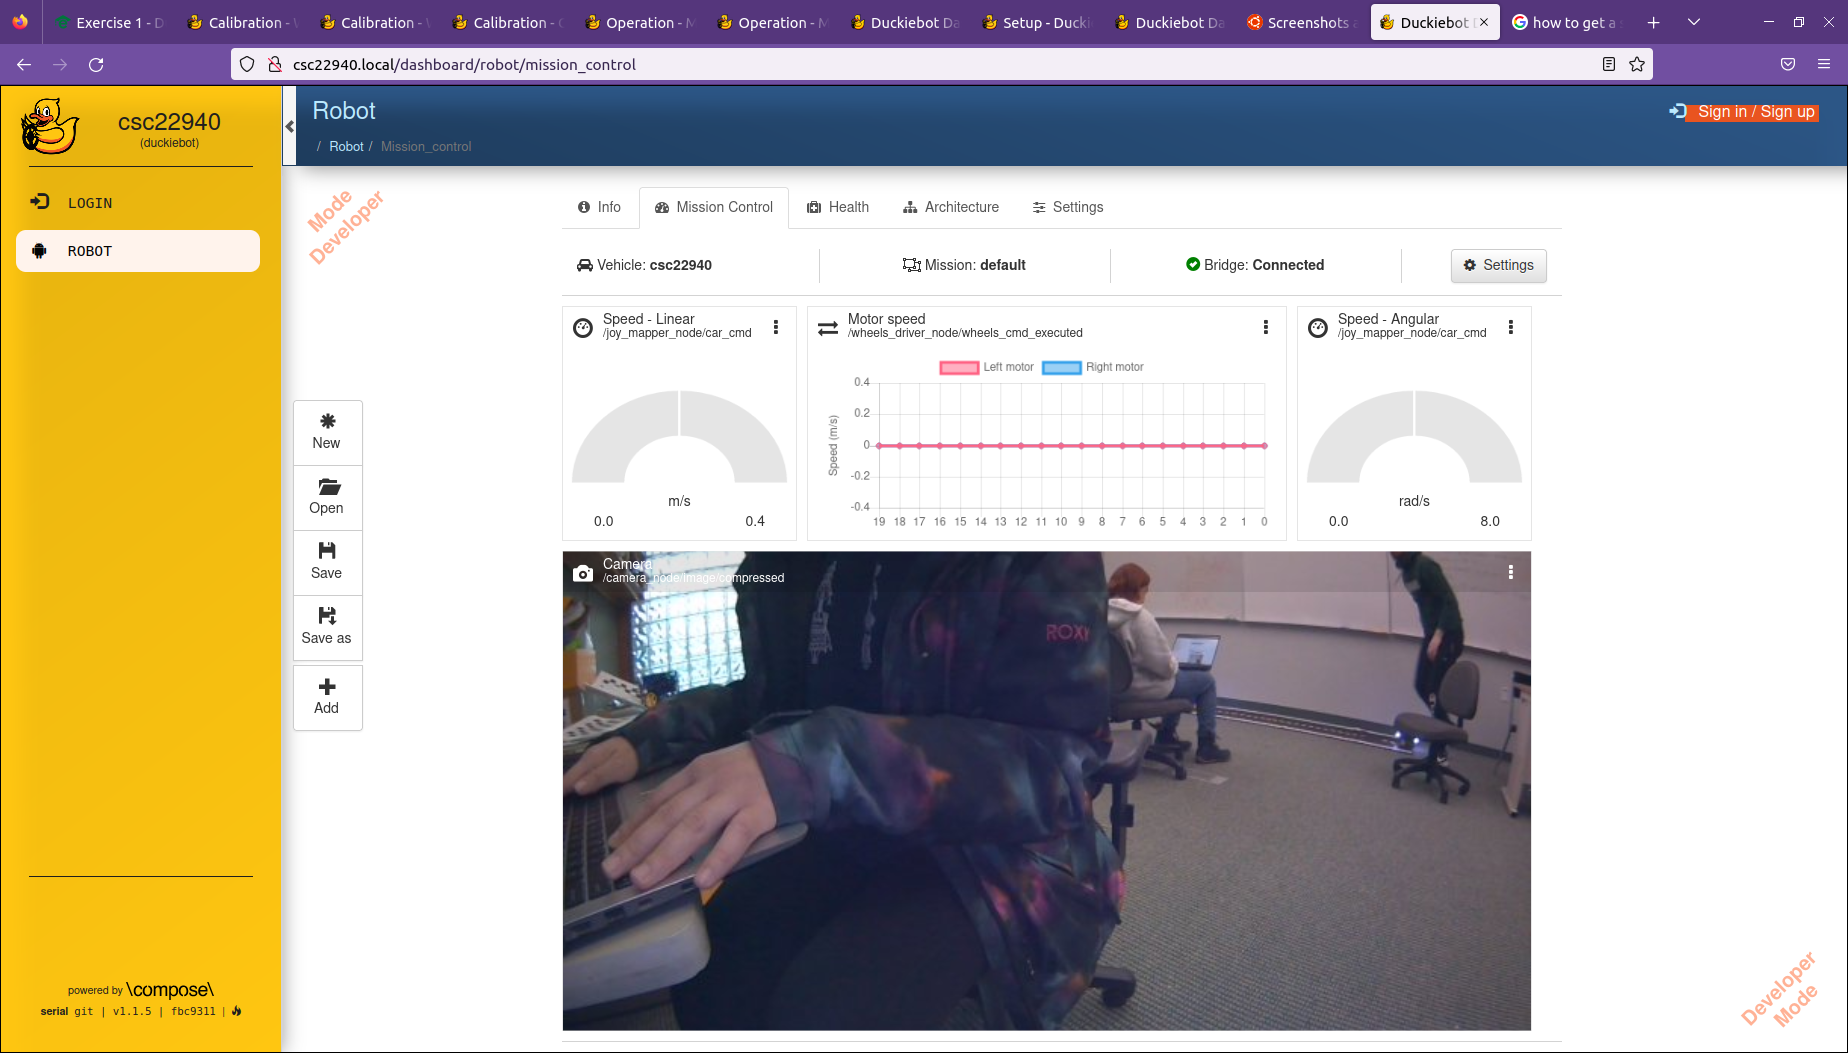
The dashboard gives valuable information about the details of how the robot is doing.
Within the dashboard, there is Portainer which allows us to see the containers that are being run on the robot. This allows us to know which processes are working healthily and helps to debug any related problems
Make the Duckiebot Move
In order to have an interface to move the robot, we can run the following command:
$dts duckiebot keyboard_control csc22940
Calibration
Even if we press the up button on the keyboard to ask the robot to just go straight, it might not! It might drift from the straight path due to the imperfections of the physical setup of the robot and the environment.
The trim parameter is set to 0 by default with the assumption that both motors and wheels are perfectly identical. (which might not be the case in the real world)
I changed this parameter with trial and error with the below command:
$rosparam set /hostname/kinematics_node/trim trim value
After setting the trim parameter to the suitable value, I saved the new settings:
$rosservice call /hostname/kinematics_node/save_calibration
The calibration result is saved on my duckiebot. It can be found on the dashboard, under the file manager part.
Challenges
I had to update the robot in order to make it move:
$dts duckiebot update csc22940
After updating, it did not work again. I had to reflash the microcontroller. (From duckieumentation: A typical example of when is necessary to flash the microcontroller is when commands are sent to the motors, e.g., through keyboard control, the motors signals on the dashboard/mission control show that signals are correctly being sent, but the Duckiebot does not move. )
This final solution made the robot move eventually.
Lane Following Demo
I followed the instructions step by step in order to make the robot autonomously follow the lane.
This step was done after camera and wheel calibration was done successfully, and I could work with the keyboard control to control the robot.
First, I checked Portainer( a part of the dashboard) to see if dt-duckiebot-interface and dt-car-interface containers are running.
If they are ready, the following command can be run:
$dts duckiebot demo --demo_name lane_following --duckiebot_name csc22940 --package_name duckietown_demos
After this container is run successfully as well, I can see the robot moving autonomously by using the keyboard_control and pressing “a”. To stop, I can press “s”.
Challenges
At first, following the instructions did not work although I could see the containers running. So I needed to update and reboot the robot to make it okay.
Make the Duckiebot See
To see the camera stream, there are two ways:
Going to the dashboard and mission control
Starting a container with access to the ROSS messages of the duckiebot:
This step can be done by running the below commands:
$dts start_gui_tools csc22940
$rqt_image_view
Calibration
To make sure the camera works correctly, I had to perform camera calibration.
It consists of two steps: intrinsic calibration and extrinsic calibration.
Intrinsic Calibration
Run the command:
$dts duckiebot calibrate_intrinsics csc22940
A screen opens and I should get the checkerboard in front of the robot, and calibrate it until all bars for x, y, size and skew are green.
Then I can calibrate and commit the results. The calibration results are saved on the duckiebot:
/data/config/calibrations/camera_intrinsic/hostname.yaml
Extrinsic Calibration
I should put the robot on the checkerboard in the correct direction and run:
$dts duckiebot calibrate_extrinsics csc22940
The results are saved at
/data/config/calibrations/camera_extrinsic/hostname.yaml
It can be downloaded from the dashboard in the file manager.
Run Code on the Duckiebot
More details for further reference can be found in Python programs and environments
Everything runs in docker images in duckiebot. Therefore, In order to run a specific code on duckiebot, we should have a duckietown-compliant docker image with our code in it. A template can be found here.
All we have to do is to clone the code, add our own script to a directory named packages, and write the code in a python file inside this directory.
We tell the docker to run the script when using the command docker run, by changing some properties in the ./launchers/default.sh
To run the code on the computer, we should run the following commands:
$dts devel build -f
$dts devel run
To run the code on the duckiebot, we should do the following steps
$ping csc22940.local
$dts devel build -f --arch arm32v7 -H csc22940.local
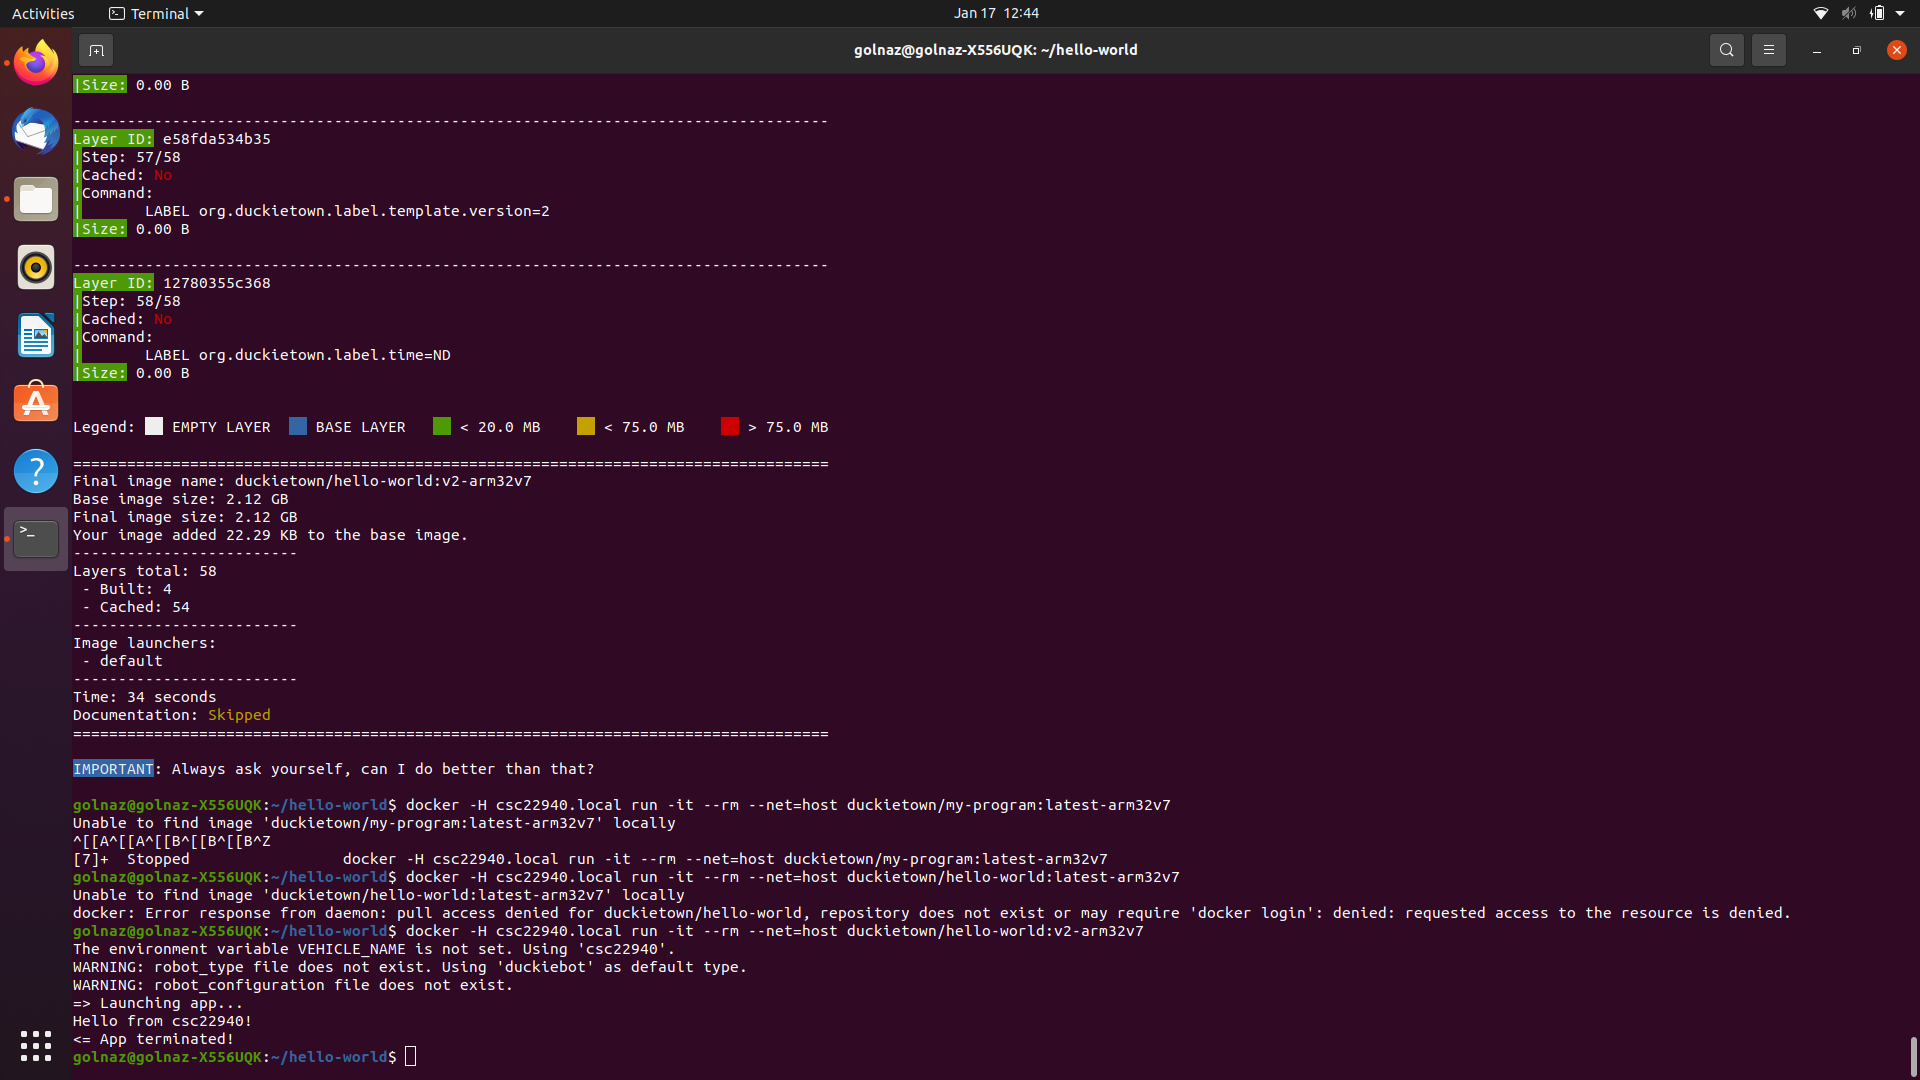
$docker -H csc22940.local run -it --rm --net=host duckietown/my-program:latest-arm32v7
Make it Say Hello World
To make the robot say hello world, we should follow the steps mentioned above, only the code in the python file should be the following:
import os
message = "Hello from %s!" % os.environ['VEHICLE_NAME']
print(message)
The result is:
Make it Detect Colors
To make the robot detect colors, we should follow the steps mentioned above, only the code in the python file should be a script that can detect colors. (Some hints and directions are provided here)
I can also build and run the program using these commands (slight differences from the above commands)
$ docker -H csc22940.local build -t colordetector .
$ docker -H csc22940.local run -it --privileged colordetector
If this step goes well, I can push the color detector to duckerhub so that others can use it as well.
First, I need to make a duckerhub account. Then I can run the following commands:
$docker -H csc22940.local push duckquackermann/colordetectorocker -H csc22940.local build -t duckquackermann/colordetector .
It can then be accessed and run by others by running the following command:
$docker -H csc22940.local run -it --privileged duckquackermann/colordetector
challenges
I found a code on github that does the color detection and tried to run it on my duckiebot, but I encountered errors and I could not solve them for now.
Takeaways
The real world might be very different from perfect theoretical settings.
Calibration is an important step, and I might need to repeat it when the robot is not behaving as it should.